Quick Verdict
Both platforms can run defect detection models, but they serve different needs:
Choose Raspberry Pi if:
- Budget is under £100
- Inference speed under 5 FPS is acceptable
- You’re prototyping or learning
- Power consumption must be minimal
Choose Jetson Nano if:
- You need real-time inference (15+ FPS)
- Running complex models (YOLOv8, ResNet50+)
- Building production systems
- GPU acceleration is required
Comparison Table
| Specification | Raspberry Pi 5 | Raspberry Pi 4 | Jetson Nano | Jetson Orin Nano |
|---|---|---|---|---|
| Price | ~£75 | ~£45 | ~£150 | ~£500 |
| CPU | Quad Cortex-A76 2.4GHz | Quad Cortex-A72 1.8GHz | Quad Cortex-A57 1.43GHz | 6-core Arm Cortex-A78AE |
| GPU | VideoCore VII | VideoCore VI | 128-core Maxwell | 1024-core Ampere |
| RAM | 4/8GB | 2/4/8GB | 4GB | 8GB |
| AI Performance | ~2 TOPS (CPU only) | ~1 TOP | ~472 GFLOPS | 40 TOPS |
| Power | 5-12W | 3-7W | 5-10W | 7-15W |
| TensorRT | No | No | Yes | Yes |
| CUDA Cores | 0 | 0 | 128 | 1024 |
Performance Benchmarks
We tested both platforms on common defect detection models:
YOLOv8n (Nano) - Object Detection
| Platform | FPS | Inference Time | Notes |
|---|---|---|---|
| Raspberry Pi 5 | 3-5 | 200-300ms | CPU only, TFLite |
| Raspberry Pi 4 | 1-2 | 500-800ms | CPU only, TFLite |
| Jetson Nano | 15-25 | 40-65ms | TensorRT FP16 |
| Jetson Orin Nano | 80-120 | 8-12ms | TensorRT FP16 |
MobileNetV2 - Classification
| Platform | FPS | Inference Time | Notes |
|---|---|---|---|
| Raspberry Pi 5 | 15-20 | 50-65ms | TFLite optimised |
| Raspberry Pi 4 | 8-12 | 80-120ms | TFLite optimised |
| Jetson Nano | 60-80 | 12-16ms | TensorRT |
| Jetson Orin Nano | 200+ | <5ms | TensorRT |
Custom Defect CNN (ResNet18 backbone)
| Platform | FPS | Inference Time | Notes |
|---|---|---|---|
| Raspberry Pi 5 | 2-4 | 250-400ms | ONNX Runtime |
| Raspberry Pi 4 | 1-2 | 500-800ms | ONNX Runtime |
| Jetson Nano | 20-30 | 33-50ms | TensorRT |
| Jetson Orin Nano | 100+ | <10ms | TensorRT |
Key Insight: The Jetson Nano delivers 5-10x better inference performance than Raspberry Pi for the same models due to GPU acceleration.
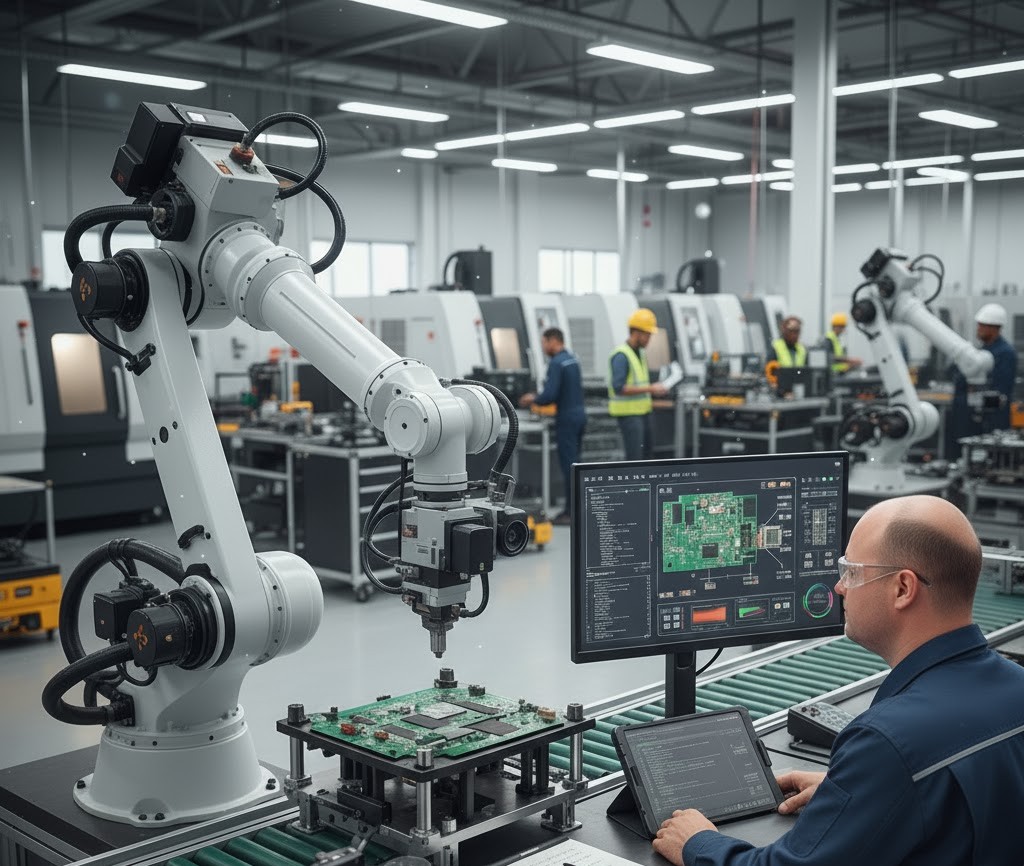
Raspberry Pi for Defect Detection
Strengths
1. Unbeatable Price-to-Entry
- Pi 4 available under £50
- Pi 5 around £75 for 8GB
- Huge ecosystem of accessories
- Camera modules from £10-50
2. Massive Community
- Millions of tutorials
- Every problem solved somewhere
- Easy to find help
- Extensive library support
3. Power Efficiency
- Runs on 5V USB-C
- 3-12W typical consumption
- Battery operation feasible
- Fanless operation possible
4. General Purpose
- Full Linux desktop
- Easy to set up
- Great for prototyping
- Works as development machine too
Limitations
1. No GPU for AI
- CPU-only inference
- TensorFlow Lite or ONNX only
- Limited model complexity
- Real-time difficult
2. Camera Bandwidth
- USB 3.0 bottleneck on Pi 4
- Better on Pi 5 with PCIe
- Limits multi-camera setups
3. Heat Management
- Throttles under sustained load
- Needs cooling for AI workloads
- Performance drops over time
Best Pi Setup for Defect Detection
1
2
3
4
5
6
7
8
9
10
11
12
13
14
15
16
17
18
19
20
21
22
23
24
25
26
27
28
29
30
31
32
33
34
35
36
37
38
39
40
# Raspberry Pi 5 optimised inference
import cv2
import numpy as np
from tflite_runtime.interpreter import Interpreter

# Load quantised TFLite model
interpreter = Interpreter(model_path="defect_model_int8.tflite")
interpreter.allocate_tensors()

input_details = interpreter.get_input_details()
output_details = interpreter.get_output_details()

# Optimise for Pi
input_shape = input_details[0]['shape']
cap = cv2.VideoCapture(0)
cap.set(cv2.CAP_PROP_FRAME_WIDTH, 640)
cap.set(cv2.CAP_PROP_FRAME_HEIGHT, 480)

while True:
    ret, frame = cap.read()

    # Preprocess
    input_data = cv2.resize(frame, (input_shape[1], input_shape[2]))
    input_data = np.expand_dims(input_data, axis=0).astype(np.uint8)

    # Inference
    interpreter.set_tensor(input_details[0]['index'], input_data)
    interpreter.invoke()

    # Get results
    output = interpreter.get_tensor(output_details[0]['index'])
    prediction = np.argmax(output)

    # Display (expect 3-5 FPS with YOLOv8n)
    cv2.putText(frame, f"Class: {prediction}", (10, 30),
                cv2.FONT_HERSHEY_SIMPLEX, 1, (0, 255, 0), 2)
    cv2.imshow('Defect Detection', frame)

    if cv2.waitKey(1) & 0xFF == ord('q'):
        break
Recommended Pi Hardware
| Component | Recommendation | Price |
|---|---|---|
| Board | Raspberry Pi 5 8GB | ~£75 |
| Camera | Pi Camera Module 3 | ~£35 |
| Storage | 64GB A2 microSD | ~£15 |
| Cooling | Active cooler | ~£10 |
| Case | Argon NEO 5 | ~£20 |
| Total | ~£155 |
For an existing Pi 4, add the Coral USB Accelerator (~£60) to boost AI inference to 15+ FPS.
Jetson Nano for Defect Detection
Strengths
1. True GPU Acceleration
- 128 CUDA cores
- TensorRT optimisation
- 10-20x faster than Pi
- Real-time inference possible
2. NVIDIA Ecosystem
- CUDA libraries
- cuDNN, TensorRT
- Jetson SDK
- NVIDIA training resources
3. Production-Ready
- Industrial temp options
- Carrier board ecosystem
- CSI-2 camera support
- Multiple camera inputs
4. Model Flexibility
- Run larger models
- Less quantisation needed
- FP16 inference
- More accurate results
Limitations
1. Higher Cost
- £150+ for Nano
- £500+ for Orin Nano
- Carrier boards add cost
- More expensive cameras recommended
2. Power Requirements
- 5-10W typical
- 20W barrel jack option
- Less battery-friendly
3. Smaller Community
- Fewer tutorials than Pi
- More specialised knowledge needed
- Slower bug fixes
4. Software Complexity
- JetPack SDK learning curve
- CUDA debugging harder
- Updates less frequent
Optimised Jetson Inference
1
2
3
4
5
6
7
8
9
10
11
12
13
14
15
16
17
18
19
20
21
22
23
24
25
26
27
28
29
30
31
32
33
34
35
36
37
38
39
40
41
42
43
44
45
46
47
48
49
50
51
52
53
54
55
56
57
58
59
60
# Jetson Nano with TensorRT
import cv2
import numpy as np
import tensorrt as trt
import pycuda.driver as cuda
import pycuda.autoinit

class TRTInference:
    def __init__(self, engine_path):
        self.logger = trt.Logger(trt.Logger.WARNING)
        with open(engine_path, 'rb') as f:
            self.engine = trt.Runtime(self.logger).deserialize_cuda_engine(f.read())
        self.context = self.engine.create_execution_context()

        # Allocate buffers
        self.inputs, self.outputs, self.bindings = [], [], []
        for binding in self.engine:
            size = trt.volume(self.engine.get_binding_shape(binding))
            dtype = trt.nptype(self.engine.get_binding_dtype(binding))
            host_mem = cuda.pagelocked_empty(size, dtype)
            device_mem = cuda.mem_alloc(host_mem.nbytes)
            self.bindings.append(int(device_mem))
            if self.engine.binding_is_input(binding):
                self.inputs.append({'host': host_mem, 'device': device_mem})
            else:
                self.outputs.append({'host': host_mem, 'device': device_mem})
        self.stream = cuda.Stream()

    def infer(self, input_data):
        np.copyto(self.inputs[0]['host'], input_data.ravel())
        cuda.memcpy_htod_async(self.inputs[0]['device'],
                               self.inputs[0]['host'], self.stream)
        self.context.execute_async_v2(self.bindings, self.stream.handle)
        cuda.memcpy_dtoh_async(self.outputs[0]['host'],
                               self.outputs[0]['device'], self.stream)
        self.stream.synchronize()
        return self.outputs[0]['host']

# Usage
detector = TRTInference("defect_model.engine")
cap = cv2.VideoCapture(0)

while True:
    ret, frame = cap.read()
    input_data = preprocess(frame)  # Your preprocessing

    # Fast inference - expect 20-30 FPS on Nano
    output = detector.infer(input_data)

    # Process results
    boxes, scores, classes = postprocess(output)

    # Visualise
    for box, score, cls in zip(boxes, scores, classes):
        if score > 0.5:
            cv2.rectangle(frame, (box[0], box[1]), (box[2], box[3]), (0, 255, 0), 2)

    cv2.imshow('Defect Detection', frame)
    if cv2.waitKey(1) & 0xFF == ord('q'):
        break
Recommended Jetson Hardware
Development Setup:
| Component | Recommendation | Price |
|---|---|---|
| Board | Jetson Nano Developer Kit | ~£150 |
| Camera | IMX219 CSI Camera | ~£25 |
| Storage | 128GB microSD | ~£20 |
| Power | 5V 4A barrel jack | ~£15 |
| Cooling | Noctua 40mm fan | ~£15 |
| Total | ~£225 |
Production Setup:
| Component | Recommendation | Price |
|---|---|---|
| Module | Jetson Orin Nano 8GB | ~£500 |
| Carrier | Seeed A205 | ~£100 |
| Camera | e-con See3CAM | ~£150 |
| Enclosure | Industrial rated | ~£100 |
| Total | ~£850 |
Head-to-Head: Use Case Recommendations
Scenario 1: Learning/Prototyping
Task: Learn defect detection, build proof of concept
| Factor | Raspberry Pi 5 | Jetson Nano |
|---|---|---|
| Initial Cost | £75 | £150 |
| Learning Curve | Low | Medium |
| Community Resources | Excellent | Good |
| Time to First Demo | 1 day | 2-3 days |
| Winner | Raspberry Pi |
Verdict: Start with Raspberry Pi. You can always upgrade later.
Scenario 2: Slow-Moving Production Line
Task: Inspect products at 1 item per second, 640x480
| Factor | Raspberry Pi 5 | Jetson Nano |
|---|---|---|
| Required FPS | 1 | 1 |
| Achievable FPS | 3-5 | 20+ |
| Headroom | Low | High |
| Cost | £155 | £225 |
| Winner | Raspberry Pi |
Verdict: Pi handles this workload. Save budget for other components.
Scenario 3: Fast Conveyor Inspection
Task: Inspect at 20+ items per second, real-time rejection
| Factor | Raspberry Pi 5 | Jetson Nano |
|---|---|---|
| Required FPS | 20+ | 20+ |
| Achievable FPS | 3-5 | 20-30 |
| Real-time Capable | No | Yes |
| Winner | Jetson Nano |
Verdict: Jetson Nano required. Consider Orin for headroom.
Scenario 4: Multi-Camera System
Task: 4 cameras, simultaneous inspection
| Factor | Raspberry Pi 5 | Jetson Nano |
|---|---|---|
| Cameras per unit | 1-2 practical | 2-4 with carrier |
| Total cost (4 Pi) | £600 | £300 |
| Synchronisation | Complex | Native MIPI |
| Winner | Jetson |
Verdict: Jetson’s multi-camera support and GPU make it more practical.
Scenario 5: Battery-Powered Mobile Inspection
Task: Portable inspection tool, 4+ hours runtime
| Factor | Raspberry Pi 5 | Jetson Nano |
|---|---|---|
| Power Draw | 5-8W | 10-15W |
| Battery (10,000mAh) | 4-6 hours | 2-3 hours |
| Weight | Lower | Higher |
| Winner | Raspberry Pi |
Verdict: Pi’s lower power wins for mobile applications.
Cost Analysis: 3-Year TCO
Single-Camera Setup
| Cost Factor | Raspberry Pi | Jetson Nano |
|---|---|---|
| Hardware | £155 | £225 |
| Replacement (2x) | £150 | £300 |
| Development Time | 40 hours | 60 hours |
| Dev Cost (@£50/hr) | £2,000 | £3,000 |
| Electricity (3yr) | £35 | £55 |
| Total | £2,340 | £3,580 |
Production Line (10 cameras)
| Cost Factor | 10x Raspberry Pi | 5x Jetson (2 cam each) |
|---|---|---|
| Hardware | £1,550 | £1,125 |
| Networking | £200 | £100 |
| Development | £5,000 | £4,000 |
| Maintenance | £1,000 | £500 |
| Electricity | £350 | £275 |
| Total | £8,100 | £6,000 |
Insight: At scale, Jetson’s multi-camera capability reduces total system cost.
Migration Path
Starting with Pi, Moving to Jetson
If you prototype on Raspberry Pi and need to upgrade:
- Use ONNX as intermediate format
1
2
3
4
5
# Export your model to ONNX
python export.py --format onnx

# Convert to TensorRT on Jetson
trtexec --onnx=model.onnx --saveEngine=model.engine --fp16
- Keep preprocessing consistent
- Use OpenCV on both platforms
- Same image normalisation
- Test with identical images
- Abstract the inference layer
1
2
3
4
5
6
7
8
9
10
# inference_backend.py
class InferenceBackend:
    def __init__(self, platform='pi'):
        if platform == 'pi':
            self.model = TFLiteModel('model.tflite')
        else:
            self.model = TensorRTModel('model.engine')

    def predict(self, image):
        return self.model.infer(image)
Decision Framework
Choose Raspberry Pi When:
- Budget under £200
- Inference speed under 5 FPS acceptable
- Learning or prototyping
- Battery operation required
- Team is new to AI/edge computing
- Using simple models (MobileNet, small CNNs)
Choose Jetson Nano When:
- Need 10+ FPS inference
- Running YOLO, ResNet, or larger models
- Building production systems
- Multi-camera setups
- Team has CUDA/GPU experience
- Future scaling likely
Choose Jetson Orin When:
- Need 50+ FPS inference
- Running multiple models simultaneously
- Video analytics workloads
- Maximum accuracy required
- Budget allows £500+ for compute
Frequently Asked Questions
Can Raspberry Pi run YOLO?
Yes, but slowly. YOLOv8n runs at 3-5 FPS on Pi 5 using TFLite. For real-time YOLO, use Jetson or add a Coral accelerator.
Is Jetson Nano discontinued?
The original Jetson Nano is end-of-life. NVIDIA now sells the Jetson Orin Nano as the entry-level option. Used Nanos are still available and supported.
Can I use the same code on both?
Mostly. OpenCV code is identical. Model loading differs (TFLite vs TensorRT). Use ONNX as a common format for easier porting.
Which is better for a school project?
Raspberry Pi. Lower cost, easier setup, more beginner resources. Jetson makes sense for university-level projects requiring real-time performance.
Should I get a Coral USB Accelerator instead of Jetson?
The Coral (~£60) + Pi combo costs less than Jetson and achieves ~15-20 FPS for supported models. Good middle-ground for simple classification. Jetson offers more flexibility for complex detection models.
What about Hailo or other accelerators?
Hailo-8L accelerators offer excellent performance but require more setup. We’ll cover alternatives in a future post. For beginners, Jetson has better documentation.
Conclusion
Raspberry Pi is the right choice for learning, prototyping, and low-speed inspection where cost matters most.
Jetson Nano/Orin is the right choice for production systems, real-time inspection, and multi-camera deployments.
Many successful projects start on Pi and graduate to Jetson. The skills transfer, and using ONNX makes migration straightforward.
Next Steps
- Starting fresh? Follow our Raspberry Pi 3D Print Monitor tutorial
- Need speed? Check our Jetson Nano Setup Guide
- Estimating costs? Use our ROI Calculator
- Comparing vendors? Read Keyence vs Cognex Comparison