Introduction
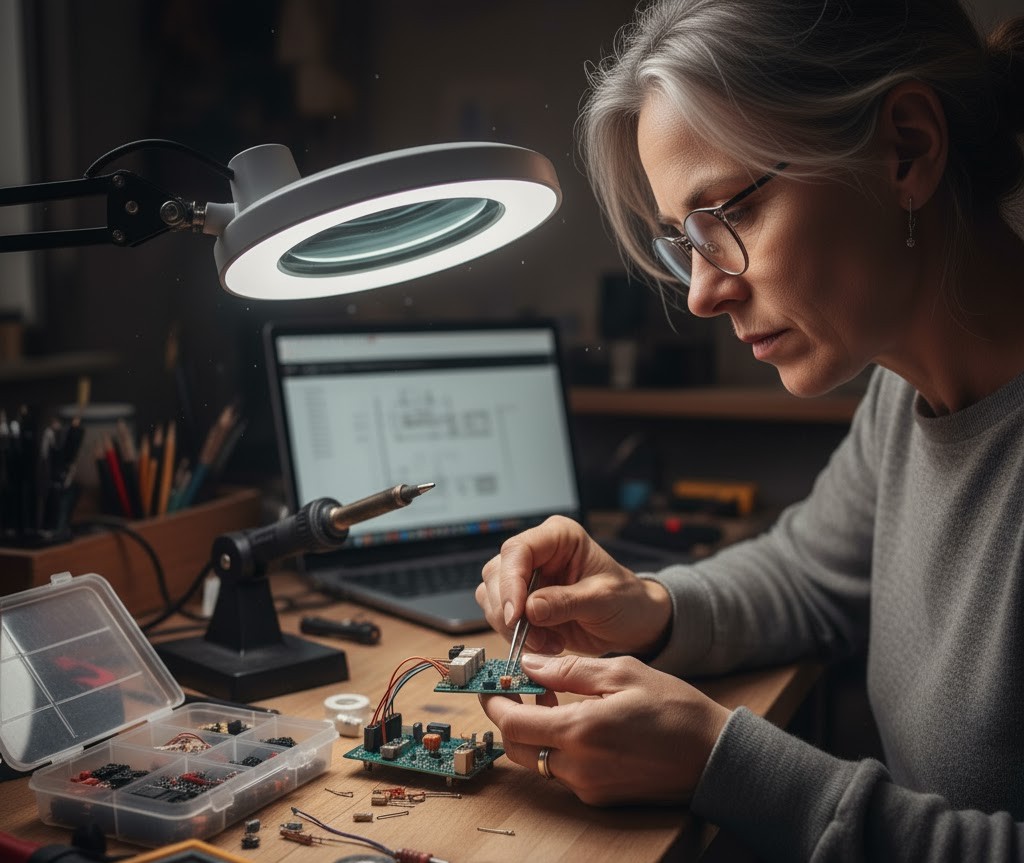
The NVIDIA Jetson Nano is an excellent edge computing platform for deploying AI defect detection systems in production environments. This guide walks you through complete setup, optimization, and deployment of real-time defect detection on Jetson Nano.
Why Jetson Nano for Defect Detection
Advantages:
- Low power consumption (5-10W)
- Compact form factor for factory floor
- Real-time inference capability
- GPU acceleration with CUDA
- Affordable price point (under $200)
- No cloud dependency
Typical Performance:
- YOLOv8n: 15-20 FPS at 640x640
- YOLOv8s: 8-12 FPS at 640x640
- Suitable for production lines up to 60 parts/minute
Applications:
- PCB inspection stations
- Assembly line quality control
- Surface defect detection
- Packaging verification
- Parts sorting systems
Hardware Requirements
Essential Components
1. NVIDIA Jetson Nano Developer Kit
- 4GB RAM version recommended
- Includes carrier board and module
- GPU: 128-core Maxwell
Available from major electronics retailers and online marketplaces.
2. Power Supply
- 5V 4A barrel jack power adapter
- Micro-USB not recommended for production
3. Storage
- Minimum: 64GB microSD card (Class 10, UHS-1)
- Recommended: 128GB+ for model storage and logging
- Production: NVMe SSD via M.2 adapter
4. Camera
- USB 3.0 industrial camera (recommended)
- Or Raspberry Pi Camera Module V2 (budget option)
- For production: GigE Vision cameras
5. Cooling
- Active cooling fan essential for continuous operation
- Noctua 40mm fan recommended
- Heat sink included with developer kit
Optional but Recommended
Network:
- Gigabit Ethernet connection
- WiFi adapter if needed
Display (for setup):
- HDMI monitor and cable
- USB keyboard and mouse
Storage:
- External SSD via USB 3.0 or M.2 slot
Part 1: Initial Setup
Step 1: Download JetPack SDK
JetPack includes Ubuntu, CUDA, cuDNN, TensorRT, and other essentials.
Download location: NVIDIA JetPack
Recommended version: JetPack 4.6.1 (most stable for Nano)
Step 2: Flash SD Card
Using balenaEtcher (easiest):
- Download and install balenaEtcher
- Insert microSD card
- Select JetPack image
- Flash
Using NVIDIA SDK Manager (advanced):
1
2
3
4
5
6
7
8
# On Ubuntu host machine
sudo apt install sdkmanager
sdkmanager --cli install \
  --logintype devzone \
  --product Jetson \
  --version 4.6.1 \
  --targetos Linux \
  --target JETSON_NANO_TARGETS
Step 3: First Boot
- Insert SD card into Jetson Nano
- Connect HDMI, keyboard, mouse
- Connect power (LED should light green)
- Follow Ubuntu setup wizard
- Create user account
- Set timezone
- Connect to network
Initial configuration:
1
2
3
4
5
6
7
8
9
10
11
12
13
14
15
16
17
18
19
20
# Update system
sudo apt update
sudo apt upgrade -y

# Install essentials
sudo apt install -y \
  nano \
  git \
  cmake \
  wget \
  curl \
  python3-pip \
  python3-dev

# Verify CUDA installation
nvcc --version

# Check GPU
sudo /usr/bin/jetson_stats
jtop  # Monitor GPU/CPU usage
Part 2: Environment Setup
Install Python Dependencies
1
2
3
4
5
6
7
8
9
10
11
12
13
14
15
16
# Upgrade pip
python3 -m pip install --upgrade pip

# Install NumPy (optimized for Jetson)
pip3 install numpy

# Install OpenCV with CUDA support (pre-installed, verify)
python3 -c "import cv2; print(cv2.getBuildInformation())"

# Install PyTorch for Jetson
# Download from NVIDIA's PyTorch for Jetson
wget https://nvidia.box.com/shared/static/...pytorch-1.10.0-aarch64.whl
pip3 install pytorch-1.10.0-aarch64.whl

# Install torchvision
pip3 install torchvision
Install Ultralytics YOLOv8
1
2
3
4
5
# Install ultralytics
pip3 install ultralytics

# Verify installation
python3 -c "from ultralytics import YOLO; print('YOLOv8 installed successfully')"
Install TensorRT (if not included)
TensorRT is pre-installed with JetPack, but verify:
1
2
3
4
5
# Check TensorRT version
python3 -c "import tensorrt as trt; print(trt.__version__)"

# Install Python bindings if missing
pip3 install pycuda
Part 3: Model Preparation and Optimization
Export Model to TensorRT
TensorRT provides 3-5x speedup on Jetson Nano.
On development machine (recommended):
1
2
3
4
5
6
7
8
9
10
11
12
13
14
from ultralytics import YOLO

# Load your trained model
model = YOLO('best.pt')

# Export to TensorRT engine for Jetson
# Note: Export on Jetson for best compatibility
model.export(
    format='engine',
    device=0,
    half=True,  # FP16 precision
    workspace=4,  # GB
    imgsz=640
)
Or export directly on Jetson:
1
2
# SSH into Jetson
yolo export model=best.pt format=engine device=0 half=True
This creates best.engine optimized for Jetson’s GPU.
Model Size Considerations
Jetson Nano RAM: 4GB total
- System: ~1GB
- Available: ~3GB
Model recommendations:
- YOLOv8n: ~6MB, 15-20 FPS
- YOLOv8s: ~22MB, 8-12 FPS
- YOLOv8m: ~50MB, 4-6 FPS (requires optimization)
1
2
3
4
5
# Check model size
import os
model_path = 'best.engine'
size_mb = os.path.getsize(model_path) / (1024 * 1024)
print(f"Model size: {size_mb:.2f} MB")
Part 4: Camera Integration
USB Camera Setup
1
2
3
4
5
6
7
8
9
10
11
12
13
14
15
16
17
18
19
20
21
22
23
24
25
26
27
import cv2

def test_usb_camera(device_id=0):
    """Test USB camera connection"""
    cap = cv2.VideoCapture(device_id)

    if not cap.isOpened():
        print(f"Cannot open camera {device_id}")
        return False

    # Set resolution
    cap.set(cv2.CAP_PROP_FRAME_WIDTH, 1280)
    cap.set(cv2.CAP_PROP_FRAME_HEIGHT, 720)
    cap.set(cv2.CAP_PROP_FPS, 30)

    # Read test frame
    ret, frame = cap.read()
    if ret:
        print(f"Camera {device_id} working!")
        print(f"Resolution: {frame.shape[1]}x{frame.shape[0]}")
        return True
    else:
        print(f"Cannot read from camera {device_id}")
        return False

# Test camera
test_usb_camera(0)
CSI Camera Setup (Raspberry Pi Camera)
1
2
3
4
5
6
7
8
9
10
11
12
13
14
15
16
17
18
19
20
21
22
23
24
25
26
27
28
29
def gstreamer_pipeline(
    sensor_id=0,
    capture_width=1280,
    capture_height=720,
    display_width=640,
    display_height=480,
    framerate=30,
    flip_method=0,
):
    """
    GStreamer pipeline for CSI camera
    """
    return (
        f"nvarguscamerasrc sensor-id={sensor_id} ! "
        f"video/x-raw(memory:NVMM), width=(int){capture_width}, height=(int){capture_height}, "
        f"format=(string)NV12, framerate=(fraction){framerate}/1 ! "
        f"nvvidconv flip-method={flip_method} ! "
        f"video/x-raw, width=(int){display_width}, height=(int){display_height}, format=(string)BGRx ! "
        f"videoconvert ! "
        f"video/x-raw, format=(string)BGR ! appsink"
    )

# Open CSI camera
cap = cv2.VideoCapture(gstreamer_pipeline(flip_method=0), cv2.CAP_GSTREAMER)

if cap.isOpened():
    print("CSI Camera opened successfully")
else:
    print("Failed to open CSI camera")
Part 5: Real-Time Defect Detection
Basic Inference Script
1
2
3
4
5
6
7
8
9
10
11
12
13
14
15
16
17
18
19
20
21
22
23
24
25
26
27
28
29
30
31
32
33
34
35
36
37
38
39
40
41
42
43
44
45
46
47
48
49
50
51
52
53
54
55
56
57
58
59
60
61
62
63
64
65
66
67
68
69
70
71
72
73
74
75
76
77
78
79
80
81
82
83
84
85
86
87
88
89
90
91
92
93
94
95
96
97
98
99
100
101
102
103
104
105
106
107
108
109
110
111
112
113
114
115
116
117
118
119
120
121
122
123
124
125
126
127
128
129
130
131
132
133
134
135
136
137
138
139
140
141
142
143
144
145
146
147
148
149
150
151
152
153
154
155
156
157
158
159
160
161
162
163
164
165
166
167
168
169
170
#!/usr/bin/env python3
"""
Real-time defect detection on Jetson Nano
"""

import cv2
import time
from ultralytics import YOLO

class JetsonDefectDetector:
    """Defect detector optimized for Jetson Nano"""

    def __init__(self, model_path='best.engine', conf_threshold=0.5):
        """
        Initialize detector

        Args:
            model_path: Path to TensorRT engine
            conf_threshold: Confidence threshold for detections
        """
        print("Loading model...")
        self.model = YOLO(model_path, task='detect')
        self.conf_threshold = conf_threshold
        print("Model loaded successfully")

    def detect(self, frame):
        """
        Run detection on single frame

        Args:
            frame: Input image (BGR)

        Returns:
            Annotated frame and detection results
        """
        # Run inference
        results = self.model(
            frame,
            conf=self.conf_threshold,
            verbose=False
        )

        # Extract results
        detections = []
        annotated_frame = frame.copy()

        for r in results:
            boxes = r.boxes
            for box in boxes:
                # Extract box info
                x1, y1, x2, y2 = map(int, box.xyxy[0])
                confidence = float(box.conf[0])
                class_id = int(box.cls[0])
                class_name = self.model.names[class_id]

                # Store detection
                detections.append({
                    'class': class_name,
                    'confidence': confidence,
                    'bbox': (x1, y1, x2, y2)
                })

                # Draw on frame
                cv2.rectangle(annotated_frame, (x1, y1), (x2, y2), (0, 255, 0), 2)
                label = f"{class_name}: {confidence:.2f}"
                cv2.putText(annotated_frame, label, (x1, y1 - 10),
                           cv2.FONT_HERSHEY_SIMPLEX, 0.5, (0, 255, 0), 2)

        return annotated_frame, detections

    def run_video(self, camera_id=0, display=False, save_path=None):
        """
        Run detection on video stream

        Args:
            camera_id: Camera device ID or GStreamer pipeline
            display: Show live preview (requires display)
            save_path: Optional path to save output video
        """
        # Open camera
        if isinstance(camera_id, str):
            # GStreamer pipeline
            cap = cv2.VideoCapture(camera_id, cv2.CAP_GSTREAMER)
        else:
            cap = cv2.VideoCapture(camera_id)

        if not cap.isOpened():
            raise RuntimeError(f"Cannot open camera {camera_id}")

        # Get camera properties
        width = int(cap.get(cv2.CAP_PROP_FRAME_WIDTH))
        height = int(cap.get(cv2.CAP_PROP_FRAME_HEIGHT))
        fps = int(cap.get(cv2.CAP_PROP_FPS))

        print(f"Camera: {width}x{height} @ {fps} FPS")

        # Setup video writer
        writer = None
        if save_path:
            fourcc = cv2.VideoWriter_fourcc(*'mp4v')
            writer = cv2.VideoWriter(save_path, fourcc, fps, (width, height))

        # FPS counter
        fps_counter = 0
        fps_start_time = time.time()
        current_fps = 0

        try:
            while True:
                ret, frame = cap.read()
                if not ret:
                    break

                # Run detection
                start_time = time.time()
                annotated_frame, detections = self.detect(frame)
                inference_time = (time.time() - start_time) * 1000  # ms

                # Calculate FPS
                fps_counter += 1
                if fps_counter >= 30:
                    current_fps = fps_counter / (time.time() - fps_start_time)
                    fps_counter = 0
                    fps_start_time = time.time()

                # Add metrics to frame
                cv2.putText(annotated_frame, f"FPS: {current_fps:.1f}",
                           (10, 30), cv2.FONT_HERSHEY_SIMPLEX, 1, (0, 255, 0), 2)
                cv2.putText(annotated_frame, f"Inference: {inference_time:.1f}ms",
                           (10, 70), cv2.FONT_HERSHEY_SIMPLEX, 1, (0, 255, 0), 2)
                cv2.putText(annotated_frame, f"Defects: {len(detections)}",
                           (10, 110), cv2.FONT_HERSHEY_SIMPLEX, 1, (0, 0, 255), 2)

                # Display
                if display:
                    cv2.imshow('Defect Detection', annotated_frame)
                    if cv2.waitKey(1) & 0xFF == ord('q'):
                        break

                # Save
                if writer:
                    writer.write(annotated_frame)

                # Print detections
                if detections:
                    print(f"\nFrame: {fps_counter}")
                    for det in detections:
                        print(f"  {det['class']}: {det['confidence']:.2f}")

        finally:
            cap.release()
            if writer:
                writer.release()
            if display:
                cv2.destroyAllWindows()

# Main execution
if __name__ == '__main__':
    # Initialize detector
    detector = JetsonDefectDetector(
        model_path='best.engine',
        conf_threshold=0.6
    )

    # Run on USB camera
    detector.run_video(
        camera_id=0,
        display=True,  # Set False for headless
        save_path='output.mp4'
    )
Save as jetson_detector.py and run:
1
python3 jetson_detector.py
Part 6: Performance Optimization
1. Enable Maximum Performance Mode
1
2
3
4
5
6
7
8
# Set to maximum performance (10W mode)
sudo nvpmodel -m 0

# Set CPU to max frequency
sudo jetson_clocks

# Verify
sudo nvpmodel -q
2. Optimize Camera Pipeline
1
2
3
4
5
6
7
8
9
10
11
12
13
14
15
16
17
18
19
20
21
22
23
24
25
26
27
28
29
30
31
32
33
34
35
36
37
38
39
40
# Use threading for camera capture
import threading
from queue import Queue

class CameraThread(threading.Thread):
    """Threaded camera capture for better performance"""

    def __init__(self, camera_id=0):
        super().__init__()
        self.camera_id = camera_id
        self.frame_queue = Queue(maxsize=2)
        self.stopped = False

    def run(self):
        cap = cv2.VideoCapture(self.camera_id)

        while not self.stopped:
            ret, frame = cap.read()
            if ret:
                if not self.frame_queue.full():
                    self.frame_queue.put(frame)

        cap.release()

    def read(self):
        return self.frame_queue.get()

    def stop(self):
        self.stopped = True

# Usage
camera = CameraThread(0)
camera.start()

while True:
    frame = camera.read()
    # Process frame
    ...

camera.stop()
3. Reduce Input Resolution
1
2
3
4
5
6
7
8
9
10
11
12
13
14
15
16
# For faster inference, resize input
def preprocess_frame(frame, target_size=416):
    """
    Resize frame for faster inference

    640x640: Higher accuracy, ~10 FPS
    416x416: Lower accuracy, ~18 FPS
    320x320: Lowest accuracy, ~25 FPS
    """
    h, w = frame.shape[:2]
    scale = target_size / max(h, w)
    new_w, new_h = int(w * scale), int(h * scale)

    resized = cv2.resize(frame, (new_w, new_h))

    return resized
4. Batch Processing
1
2
3
4
5
# Process frames in batches
def batch_inference(frames, model, batch_size=4):
    """Process multiple frames at once"""
    results = model(frames, batch=batch_size)
    return results
Part 7: Production Deployment
Systemd Service Setup
Create a systemd service for automatic startup:
1
2
# Create service file
sudo nano /etc/systemd/system/defect-detector.service
1
2
3
4
5
6
7
8
9
10
11
12
13
14
[Unit]
Description=Defect Detection Service
After=network.target

[Service]
Type=simple
User=your_username
WorkingDirectory=/home/your_username/defect_detection
ExecStart=/usr/bin/python3 /home/your_username/defect_detection/jetson_detector.py
Restart=always
RestartSec=10

[Install]
WantedBy=multi-user.target
1
2
3
4
5
6
7
8
9
# Enable and start service
sudo systemctl enable defect-detector.service
sudo systemctl start defect-detector.service

# Check status
sudo systemctl status defect-detector.service

# View logs
sudo journalctl -u defect-detector.service -f
Data Logging
1
2
3
4
5
6
7
8
9
10
11
12
13
14
15
16
17
18
19
20
21
22
23
24
25
26
27
28
29
30
31
32
33
import json
from datetime import datetime
from pathlib import Path

class DefectLogger:
    """Log detections to file"""

    def __init__(self, log_dir='logs'):
        self.log_dir = Path(log_dir)
        self.log_dir.mkdir(exist_ok=True)

    def log_detection(self, detections, image_path=None):
        """Log detection results"""
        timestamp = datetime.now()
        log_entry = {
            'timestamp': timestamp.isoformat(),
            'num_defects': len(detections),
            'detections': detections
        }

        # Save to JSON
        log_file = self.log_dir / f"{timestamp.strftime('%Y%m%d')}.jsonl"
        with open(log_file, 'a') as f:
            f.write(json.dumps(log_entry) + '\n')

        # Save image if defects found
        if detections and image_path:
            save_path = self.log_dir / f"{timestamp.strftime('%Y%m%d_%H%M%S')}.jpg"
            # Save image logic here

# Usage
logger = DefectLogger()
logger.log_detection(detections)
Remote Monitoring
1
2
3
4
5
6
7
8
9
10
11
12
13
14
15
16
17
18
19
20
21
22
23
24
25
26
27
28
29
import requests

class RemoteMonitor:
    """Send alerts to remote server"""

    def __init__(self, api_endpoint):
        self.api_endpoint = api_endpoint

    def send_alert(self, defect_data):
        """Send defect alert"""
        try:
            response = requests.post(
                self.api_endpoint,
                json=defect_data,
                timeout=5
            )
            return response.status_code == 200
        except Exception as e:
            print(f"Failed to send alert: {e}")
            return False

# Usage
monitor = RemoteMonitor('https://your-server.com/api/alerts')
if detections:
    monitor.send_alert({
        'device_id': 'jetson_01',
        'timestamp': datetime.now().isoformat(),
        'defects': detections
    })
Part 8: GPIO Integration
Control Reject Mechanism
1
2
3
4
5
6
7
8
9
10
11
12
13
14
15
16
17
18
19
20
21
22
23
24
25
26
27
28
29
30
31
32
33
34
35
36
37
38
39
40
41
42
43
import Jetson.GPIO as GPIO
import time

class RejectController:
    """Control pneumatic reject system via GPIO"""

    def __init__(self, pin=7):
        """
        Initialize GPIO for reject control

        Args:
            pin: GPIO pin number (BOARD numbering)
        """
        self.pin = pin

        # Setup GPIO
        GPIO.setmode(GPIO.BOARD)
        GPIO.setup(self.pin, GPIO.OUT, initial=GPIO.LOW)

    def trigger_reject(self, duration=0.5):
        """
        Activate reject mechanism

        Args:
            duration: Pulse duration in seconds
        """
        GPIO.output(self.pin, GPIO.HIGH)
        time.sleep(duration)
        GPIO.output(self.pin, GPIO.LOW)

    def cleanup(self):
        """Clean up GPIO"""
        GPIO.cleanup()

# Usage
reject = RejectController(pin=7)

# In detection loop
if defects_detected:
    reject.trigger_reject(0.3)  # 300ms pulse

# At program exit
reject.cleanup()
Part 9: Troubleshooting
Common Issues and Solutions
Issue 1: Low FPS
Symptoms: < 10 FPS with YOLOv8n
Solutions:
1
2
3
4
5
6
7
8
9
10
11
12
13
# Enable max performance
sudo nvpmodel -m 0
sudo jetson_clocks

# Reduce input size
# In code: resize frames to 416x416 or 320x320

# Use TensorRT engine (not .pt file)
# Ensure model.export() was run

# Check for thermal throttling
sudo tegrastats
# If temp > 60°C, add cooling
Issue 2: Out of Memory
Symptoms: Model loading fails or crashes
Solutions:
1
2
3
4
5
6
7
8
9
10
11
# Increase swap
sudo systemctl disable nvzramconfig
sudo fallocate -l 4G /swapfile
sudo chmod 600 /swapfile
sudo mkswap /swapfile
sudo swapon /swapfile

# Add to /etc/fstab for persistence
echo '/swapfile none swap sw 0 0' | sudo tee -a /etc/fstab

# Use smaller model (YOLOv8n instead of YOLOv8s)
Issue 3: Camera Not Detected
USB Camera:
1
2
3
4
5
6
7
8
9
# List USB devices
lsusb

# Check video devices
ls -l /dev/video*

# Test with v4l2
v4l2-ctl --list-devices
v4l2-ctl -d /dev/video0 --list-formats-ext
CSI Camera:
1
2
3
4
5
6
# Verify camera connection
ls -l /dev/video*
# Should see /dev/video0

# Test capture
gst-launch-1.0 nvarguscamerasrc ! 'video/x-raw(memory:NVMM),width=1280,height=720' ! nvoverlaysink
Issue 4: TensorRT Export Fails
Error: TensorRT export fails on Jetson
Solution:
1
2
3
4
5
6
7
8
# Ensure TensorRT is installed
python3 -c "import tensorrt; print(tensorrt.__version__)"

# Install missing dependencies
pip3 install pycuda

# Export with specific settings
yolo export model=best.pt format=engine device=0 half=True simplify=True workspace=2
Part 10: Advanced Features
Multi-Camera Setup
1
2
3
4
5
6
7
8
9
10
11
12
13
14
15
16
17
18
19
20
21
22
23
24
25
26
27
28
class MultiCameraDetector:
    """Handle multiple cameras simultaneously"""

    def __init__(self, model_path, camera_ids=[0, 1]):
        self.model = YOLO(model_path)
        self.cameras = []

        for cam_id in camera_ids:
            cap = cv2.VideoCapture(cam_id)
            if cap.isOpened():
                self.cameras.append({
                    'id': cam_id,
                    'capture': cap,
                    'thread': None
                })

    def process_all(self):
        """Process all cameras concurrently"""
        frames = []
        for cam in self.cameras:
            ret, frame = cam['capture'].read()
            if ret:
                frames.append(frame)

        # Batch inference
        if frames:
            results = self.model(frames)
            return results
Quality Trend Analysis
1
2
3
4
5
6
7
8
9
10
11
12
13
14
15
16
17
18
19
20
21
22
23
24
25
26
27
28
29
30
31
32
33
34
35
36
37
38
39
import pandas as pd
import matplotlib.pyplot as plt

class QualityAnalyzer:
    """Analyze defect trends over time"""

    def __init__(self, log_dir='logs'):
        self.log_dir = Path(log_dir)

    def load_logs(self, date):
        """Load logs for specific date"""
        log_file = self.log_dir / f"{date}.jsonl"
        data = []

        with open(log_file, 'r') as f:
            for line in f:
                data.append(json.loads(line))

        return pd.DataFrame(data)

    def generate_report(self, date):
        """Generate daily quality report"""
        df = self.load_logs(date)

        report = {
            'total_inspections': len(df),
            'total_defects': df['num_defects'].sum(),
            'defect_rate': df['num_defects'].sum() / len(df),
            'defect_types': {}
        }

        # Analyze defect types
        for detections in df['detections']:
            for det in detections:
                cls = det['class']
                report['defect_types'][cls] = \
                    report['defect_types'].get(cls, 0) + 1

        return report
Hardware Recommendations for Production
Jetson Device Selection:
For different production needs:
Entry Level (< 30 parts/min):
- Jetson Nano 4GB
- Affordable and sufficient for YOLOv8n
- 5-10W power consumption
Mid Range (30-60 parts/min):
- Jetson Xavier NX
- 2-3x faster than Nano
- Better thermal management
- 10-15W power
High Performance (60+ parts/min):
- Jetson AGX Xavier
- Professional-grade
- Multiple camera support
- 10-30W power
Camera Selection:
Industrial cameras available from major suppliers:
- USB 3.0 Industrial Cameras - Easy integration with Jetson Nano
- GigE Vision Cameras - Long cable runs up to 100m
- High Frame Rate Cameras 60+ FPS - For fast-moving production lines
- Global Shutter Cameras - Eliminates motion blur
Cooling Solutions:
- Noctua 40mm Cooling Fans - Quiet, reliable cooling for continuous operation
- Heat Sinks for Jetson - Passive cooling for quiet environments
- Jetson Nano Cases with Fans - All-in-one professional enclosures
Power and Networking:
- 5V 4A Power Adapters - Essential for stable Jetson operation
- Gigabit Ethernet Cables - Fast data transfer
- PoE Adapters for Jetson - Simplify installation with single cable
Best Practices for Production Deployment
1. Thermal Management
1
2
3
4
5
6
7
8
9
10
11
12
13
14
15
16
17
# Monitor temperature
import subprocess

def check_temperature():
    """Read Jetson temperature"""
    result = subprocess.run(
        ['cat', '/sys/devices/virtual/thermal/thermal_zone0/temp'],
        capture_output=True, text=True
    )
    temp = int(result.stdout.strip()) / 1000  # Convert to Celsius
    return temp

# In main loop
temp = check_temperature()
if temp > 70:
    print(f"WARNING: High temperature {temp}°C")
    # Reduce clock speed or pause processing
2. Watchdog Timer
1
2
3
4
5
6
7
8
9
10
11
12
13
14
15
16
17
18
19
20
21
# Auto-restart on crashes
import subprocess

class Watchdog:
    """Monitor process health"""

    def __init__(self, timeout=30):
        self.timeout = timeout
        self.last_update = time.time()

    def ping(self):
        """Update watchdog"""
        self.last_update = time.time()

    def check(self):
        """Check if process is alive"""
        if time.time() - self.last_update > self.timeout:
            print("Watchdog timeout - restarting")
            # Implement restart logic
            return False
        return True
3. Data Backup
1
2
3
# Auto-backup logs to network storage
# Add to crontab
0 2 * * * rsync -av /home/user/logs/ /mnt/network/backups/
Cost Analysis
Hardware Costs (Approximate):
- Jetson Nano 4GB: $99-$150
- Power Supply: $10-$20
- microSD Card (128GB): $20-$30
- Industrial USB Camera: $50-$200
- Cooling Fan: $10-$20
- Enclosure: $20-$50
Total Budget: $200-$500
vs. Cloud Alternatives:
- Cloud GPU inference: $0.50-$2.00 per hour
- Break-even: 100-250 hours
- Jetson pays for itself in 1-3 months
Conclusion
The NVIDIA Jetson Nano provides an excellent platform for deploying AI defect detection at the edge. With proper optimization, you can achieve real-time performance suitable for most manufacturing applications.
Key Takeaways:
- TensorRT optimization is essential for good performance
- Proper cooling prevents thermal throttling
- USB cameras easier to integrate than CSI
- Production deployment requires monitoring and logging
- Cost-effective alternative to cloud inference
Next Steps:
- Set up Jetson Nano with JetPack
- Export your model to TensorRT
- Test with camera integration
- Optimize for target FPS
- Deploy with systemd service
- Monitor and iterate
Additional Resources
Official Documentation:
Community Resources:
Books:
- Getting Started with AI on Jetson Nano
- Practical Deep Learning for Edge Devices
Have questions about Jetson deployment? Need help optimizing your model? Contact us for consultation.
Related Tutorials: